Creating the Group Bands
Group Header and Group Footer bands will be created which will surround the Detail Band. Since the report is structured to print employees by department name with an employee count and sum of salaries for each department, use of Groups is necessary.
- Within the Band Report Editor, click the “Create a Band Group” icon
 , then click anywhere within the image of the report. The following dialog box will appear:
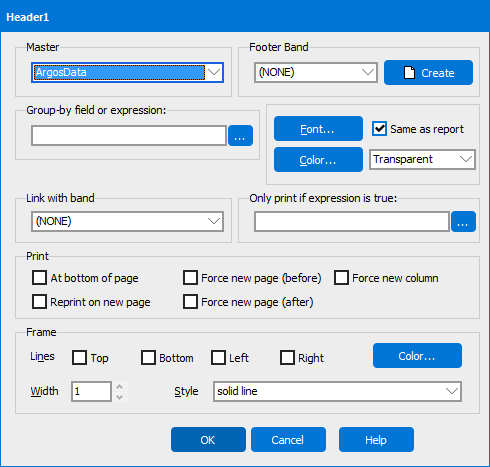
Band Groups are processed as follows:
- Before printing the first record in the Detail band, the Group Header is printed.
- The first Detail record is printed.
- The Group-by Field in the next Detail record is examined:
- If the Group-by Field has the same value as the previous detail record, the next Detail record is printed.
- If the Group-by Field has a different value than the previous record, the Group Footer is printed. A new Group Header and the next Detail record is printed.
Note: The Group-by Field can be a simple Data Field from the dataset, or can be a complex Expression. If you wish to create a Band Group, you should ensure that your data is sorted (ORDER BY) on the Data Field(s) or Expressions(s) you wish to use.
- To enter the item that the detail band will be grouped by, click the ellipses button
 to the right of the “Group by field or expression” text field.
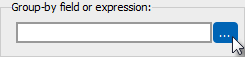
This will launch the Expression Wizard:
- Click the Database Field button and select dept_id from the list of available fields. The dataset for this example is ArgosData.
Remember: When grouping by a particular field (dept_id in this example), the data must be sorted by the same field.
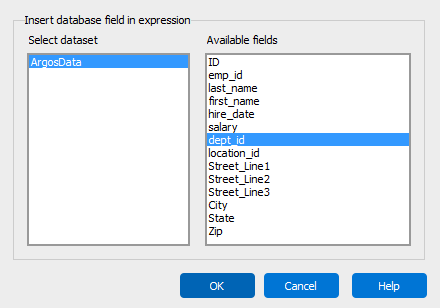
- Click OK, then click OK on Expression Editor to exit and return to the group band options dialog.
You will see that your expression now appears in the "Group-by field or expression" field. A later example will illustrate how to group by an expression as opposed to this example where grouping is done by database field. - Click the Create button in the upper right corner of the dialog (in the Footer Band section) to create a corresponding Group Footer, then click OK.
The Banded Editor will now appear as follows:
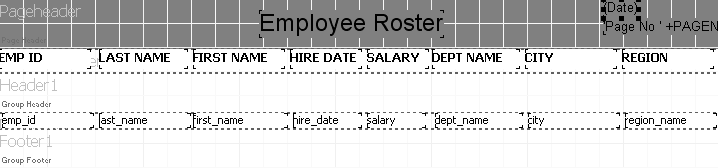
Note the existence of the Group Header (Header 1) and Footer Bands (Footer 1) surrounding the Detail Band.
Tip: Argos generates names for each band, but you can rename the bands. Note on the figure to the left that “Pageheader” is the label given to the Page Header Band and “Columnheader” is the name given to the Column Header Band.
To change the name of the band:
- Right click anywhere within the band and click on “Options” to launch the Options dialog.
- Within the “Name” field enter the name of your choice (spaces between words are not permitted). The new name will replace the name given by Argos.
- Click OK.
When many bands are created in a complex report, creating meaningful names will be useful when referencing bands.
At this point the report will look like this:
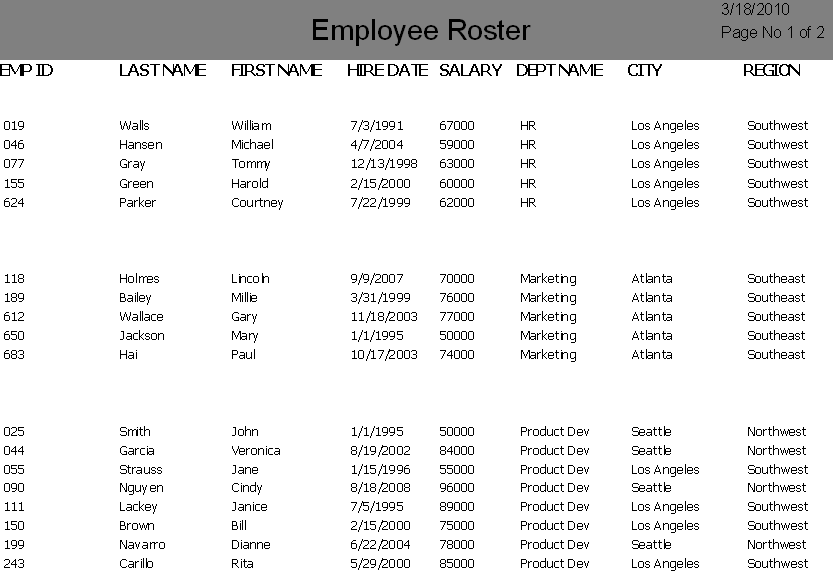
Note the grouping by Department Name as well as the existence of the date and page count at the top right of the report.
Next steps:
- Move the department name into the Group Header Band
- Add background color to the Group Header Band
- Add a child band after the Group Header band which will contain column headers. The existing column header band will then be removed.
- Add employee count and sum of salaries for each department in the Group Footer Band.
- Add a summary band containing a total employee count and sum of salaries.